Framer
How to Add Calendly to Your Framer Website
In this post, we'll walk you through how you can get Calendly set up on your Framer website in just a few easy steps.

Hamza Ehsan
Web Designer & Entrepreneur
Calendly is a must-have for simplifying your client scheduling and giving your visitors an effortless way to book a call with you.
If you're here, you probably already know how frustrating it can be to make booking links work properly on a website.
But thankfully, Framer makes that process as simple as it should be and in this post, we'll walk you through how you can get Calendly set up on your Framer website in just a few easy steps.
Embedding Calendly
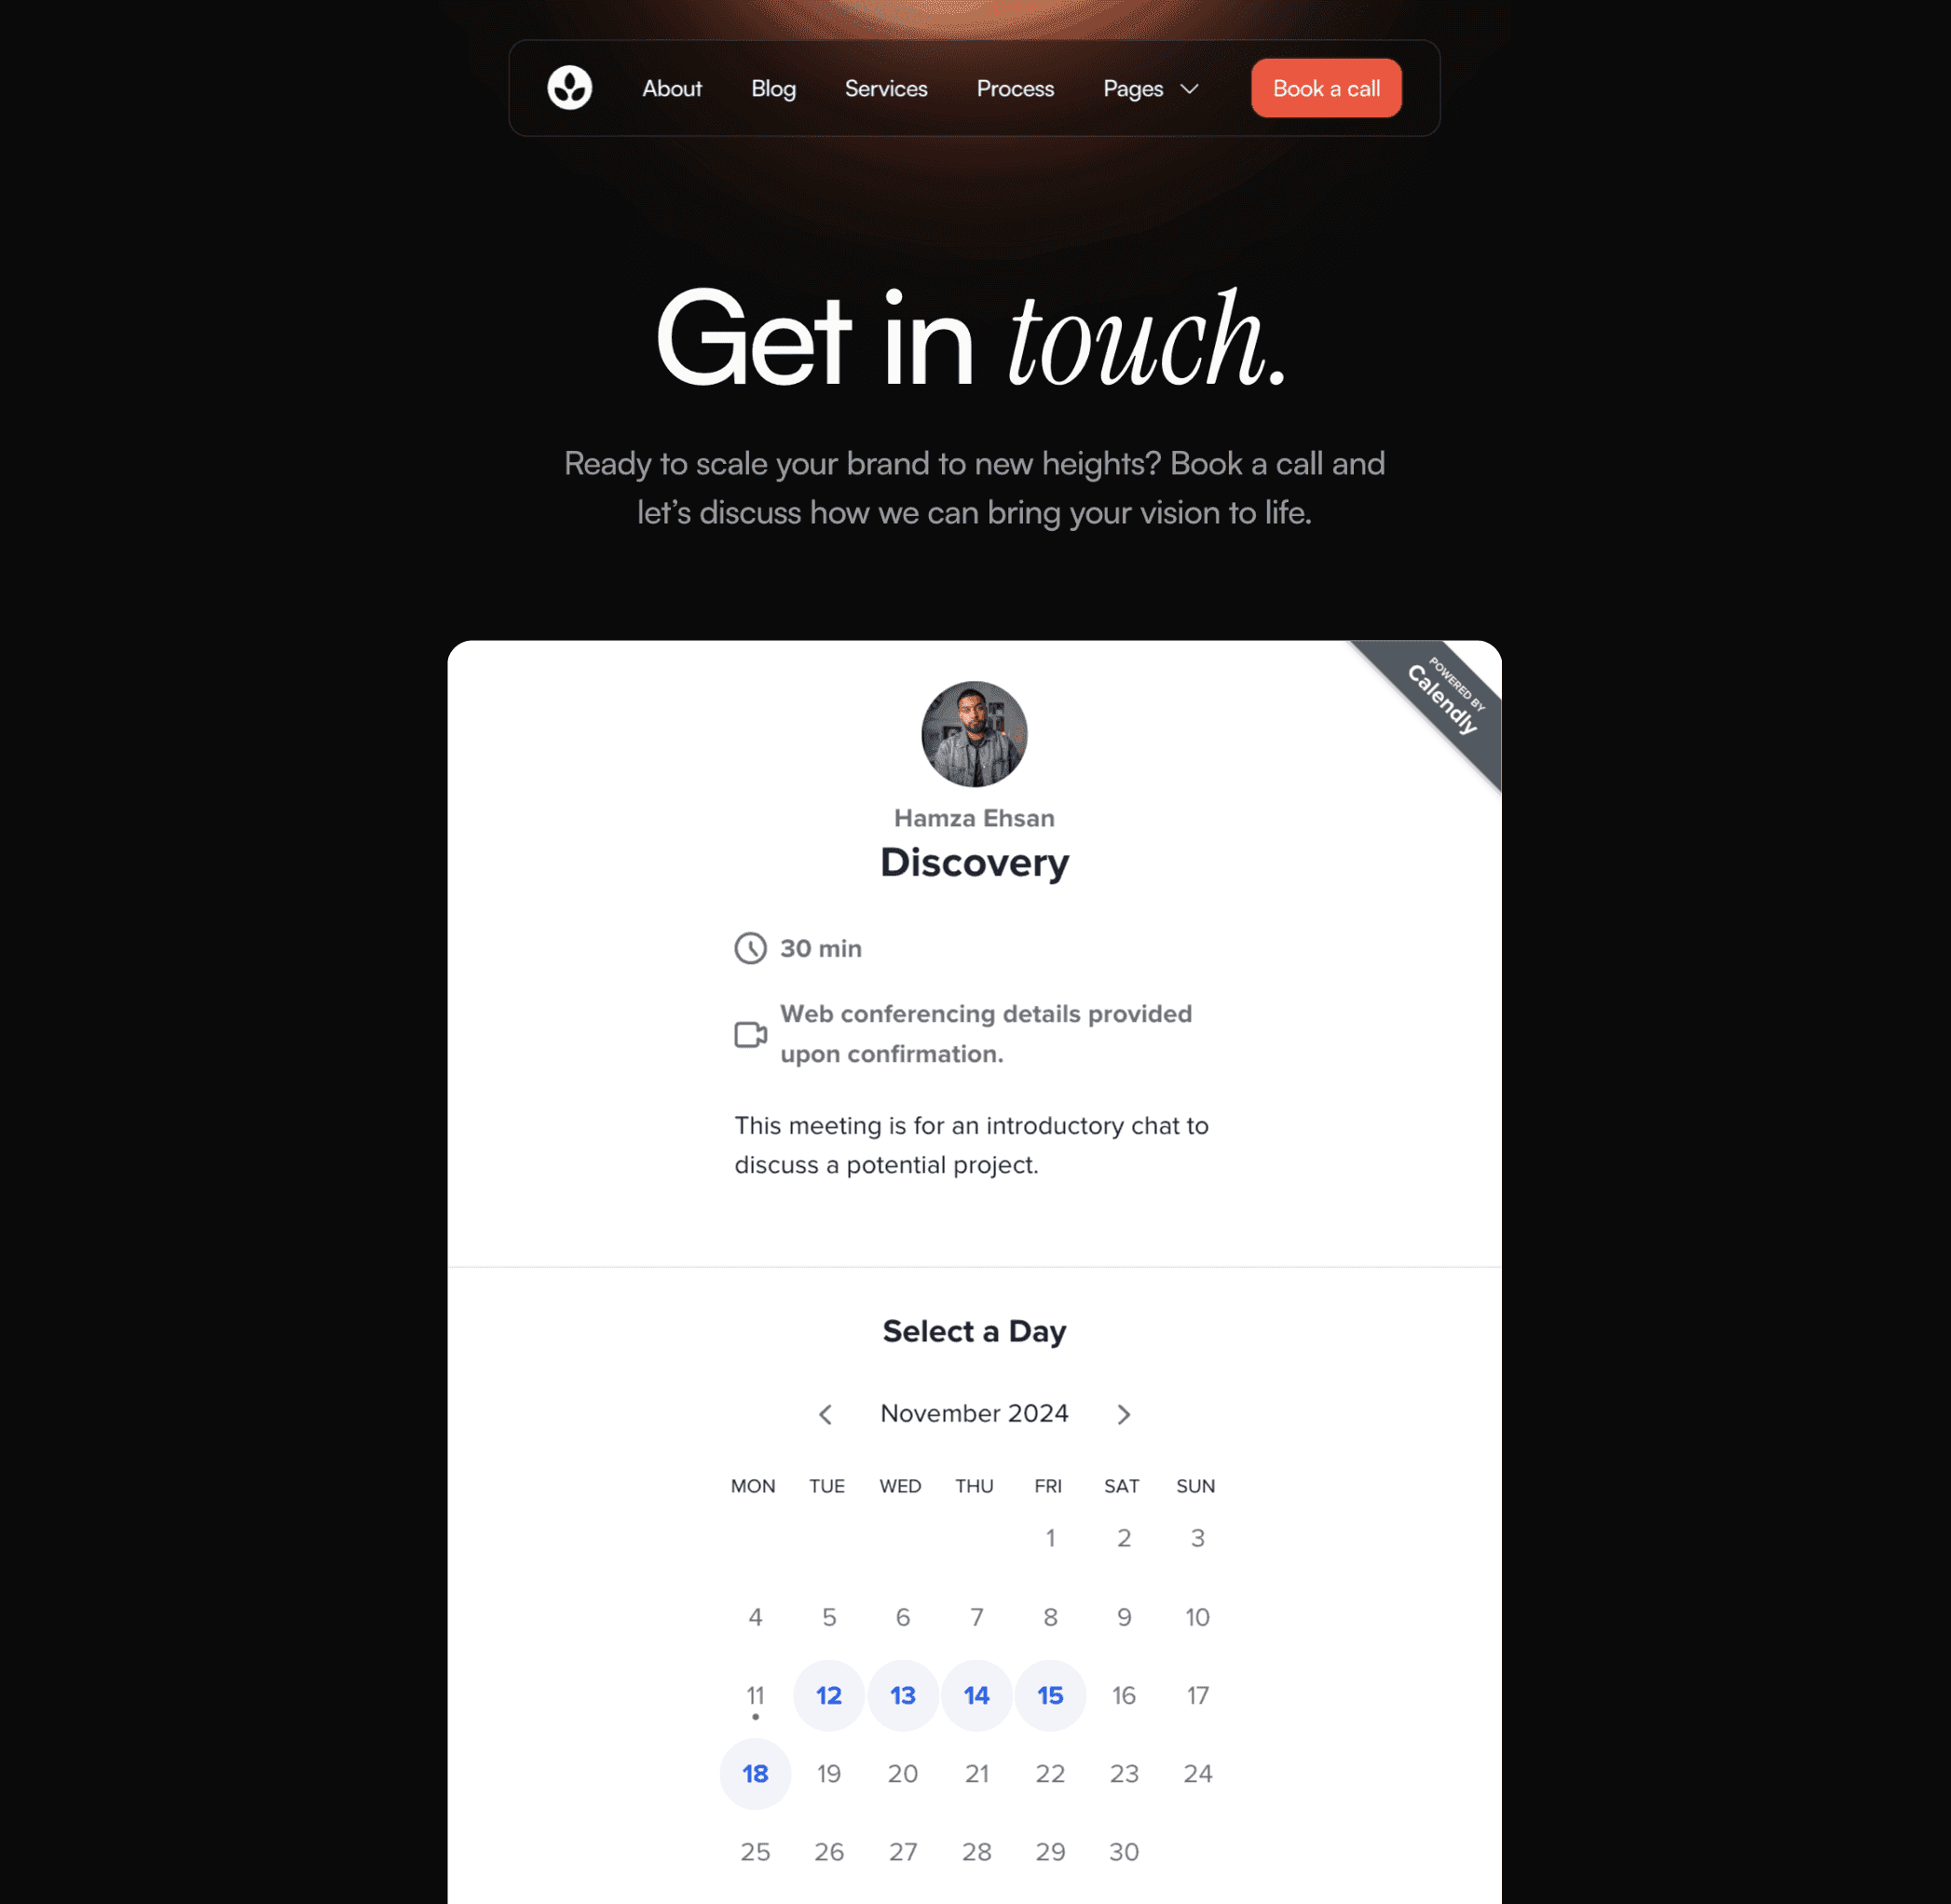
The first way you can set up Calendly on your Framer website is by directly embedding it onto your website.
This is the quickest and easiest way to get Calendly on your Framer website, so let's get into how to set it up.
Step 1 - Insert Calendly Component
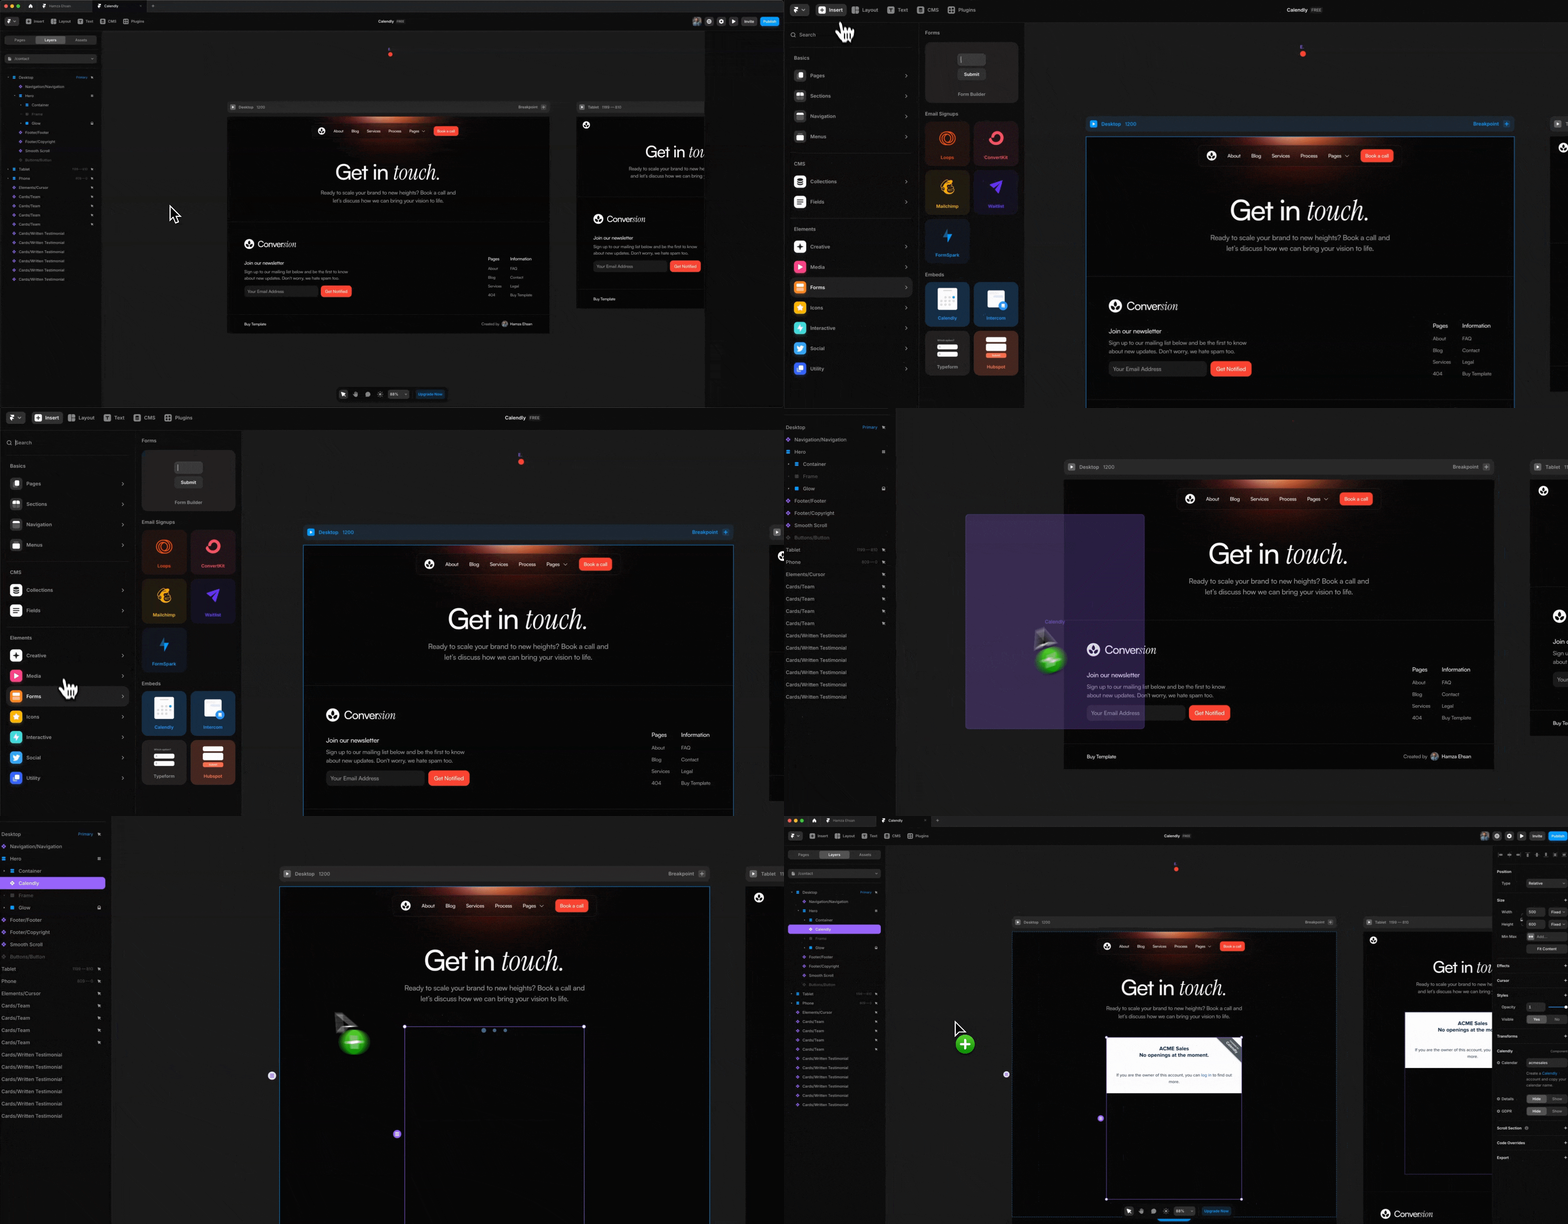
Open up your Framer website and navigate to where you want to embed your Calendly calendar.
In the Insert menu, hover to Forms, drag the Calendly component onto your site, and adjust the size to fit your design.
Step 2 - Copy Calendar Name
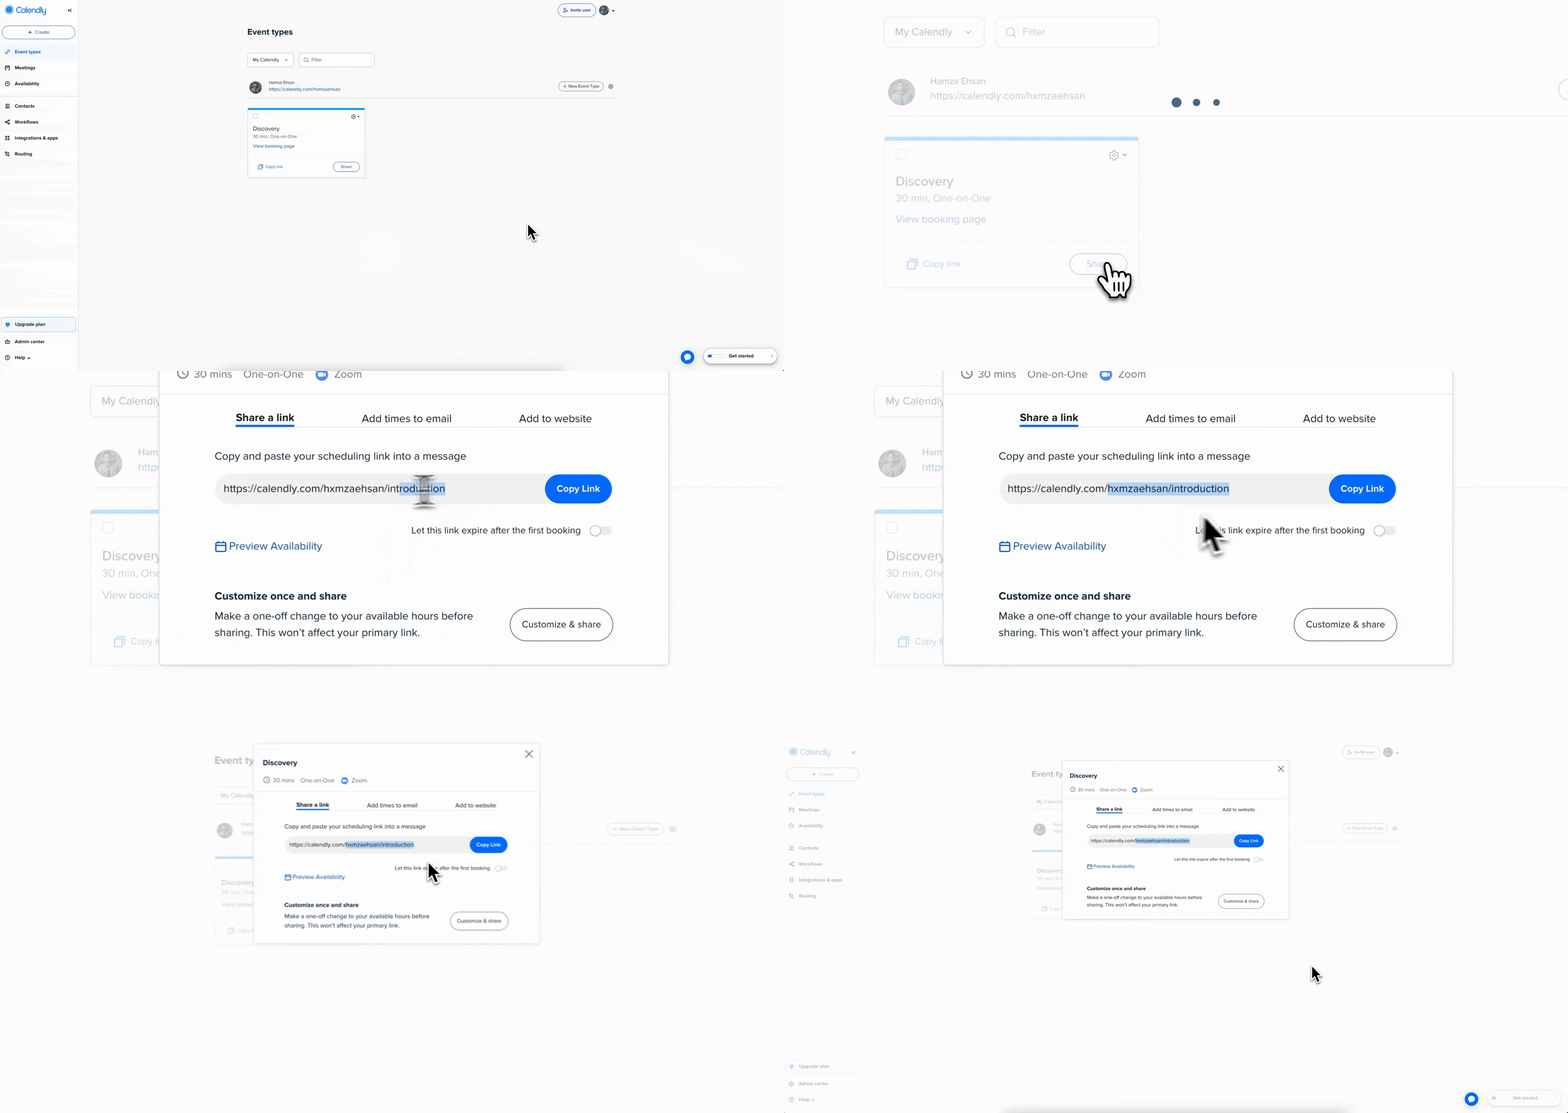
Next, head over to your Calendly account, find the event that you'd like visitors to be able to book, and click Share.
Then, copy your calendar and event name (which is basically everything after https://calendly.com/).
Step 3 - Configure Component
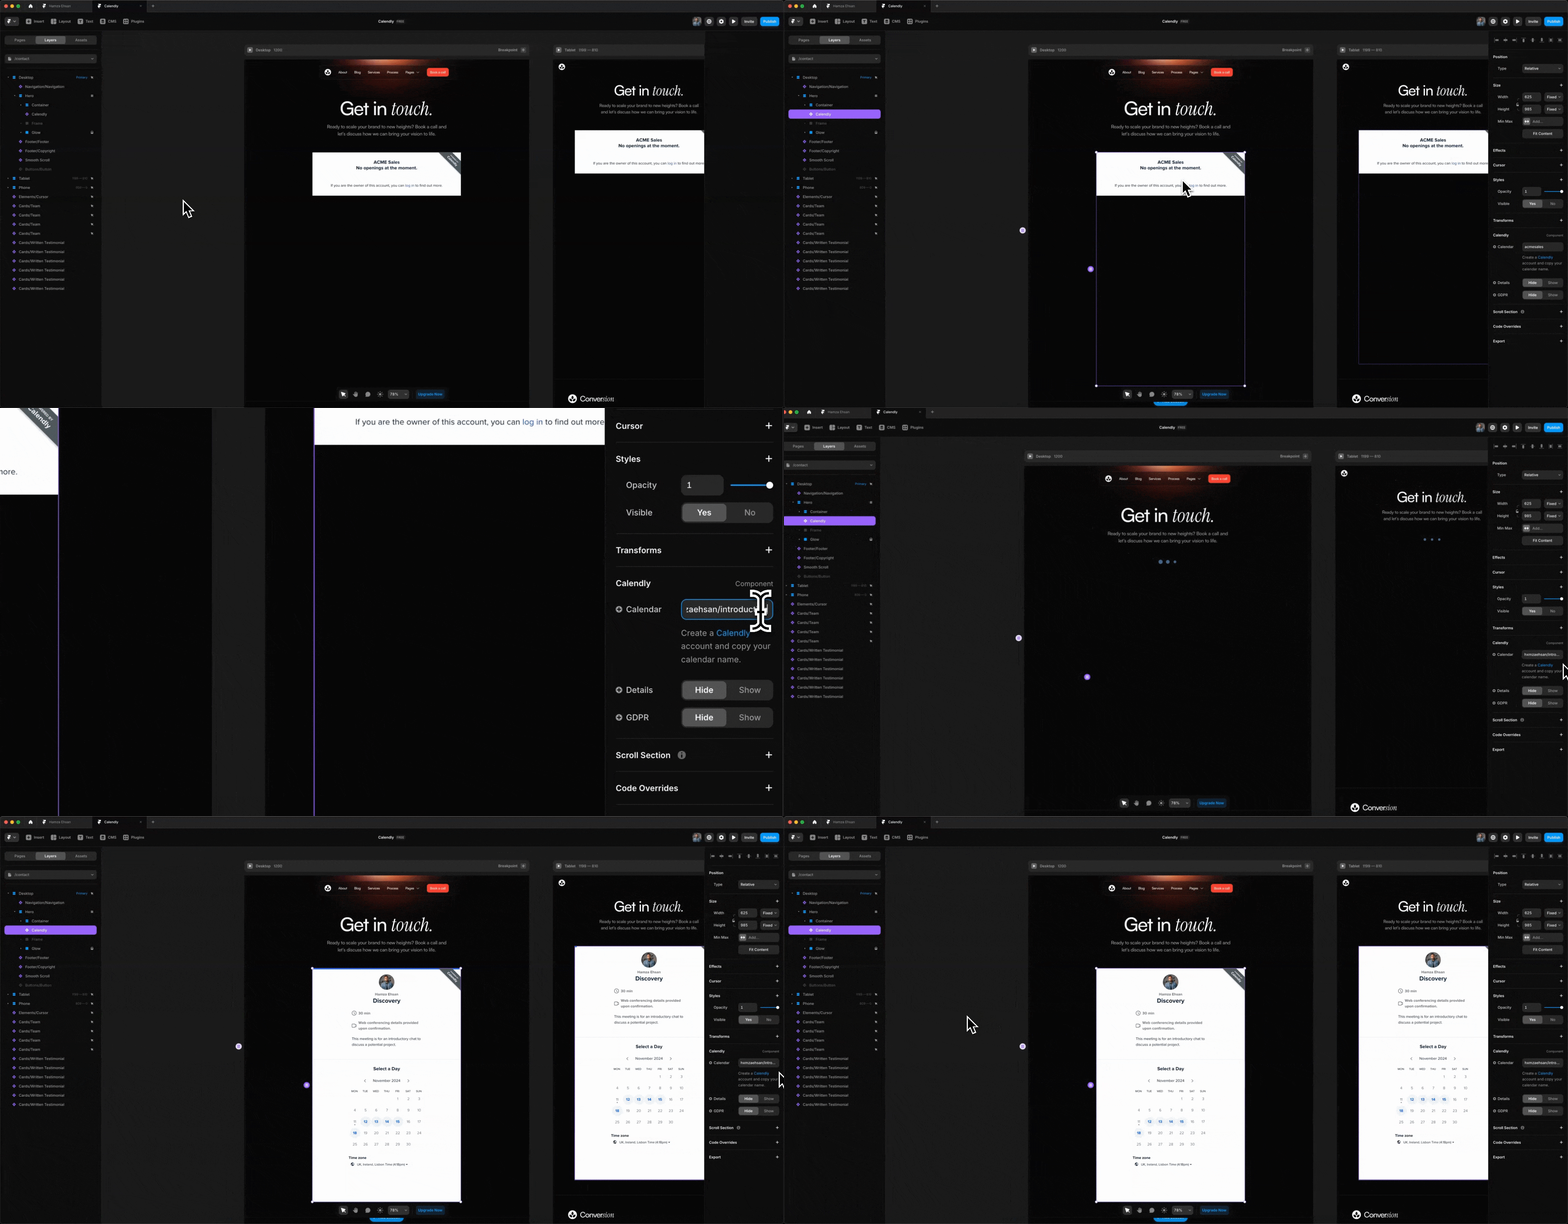
Then head back to Framer, and paste it into the Calendly component.
From there, your calendar will appear and you can go ahead and test to ensure it works as intended.
Creating a Calendly Popup
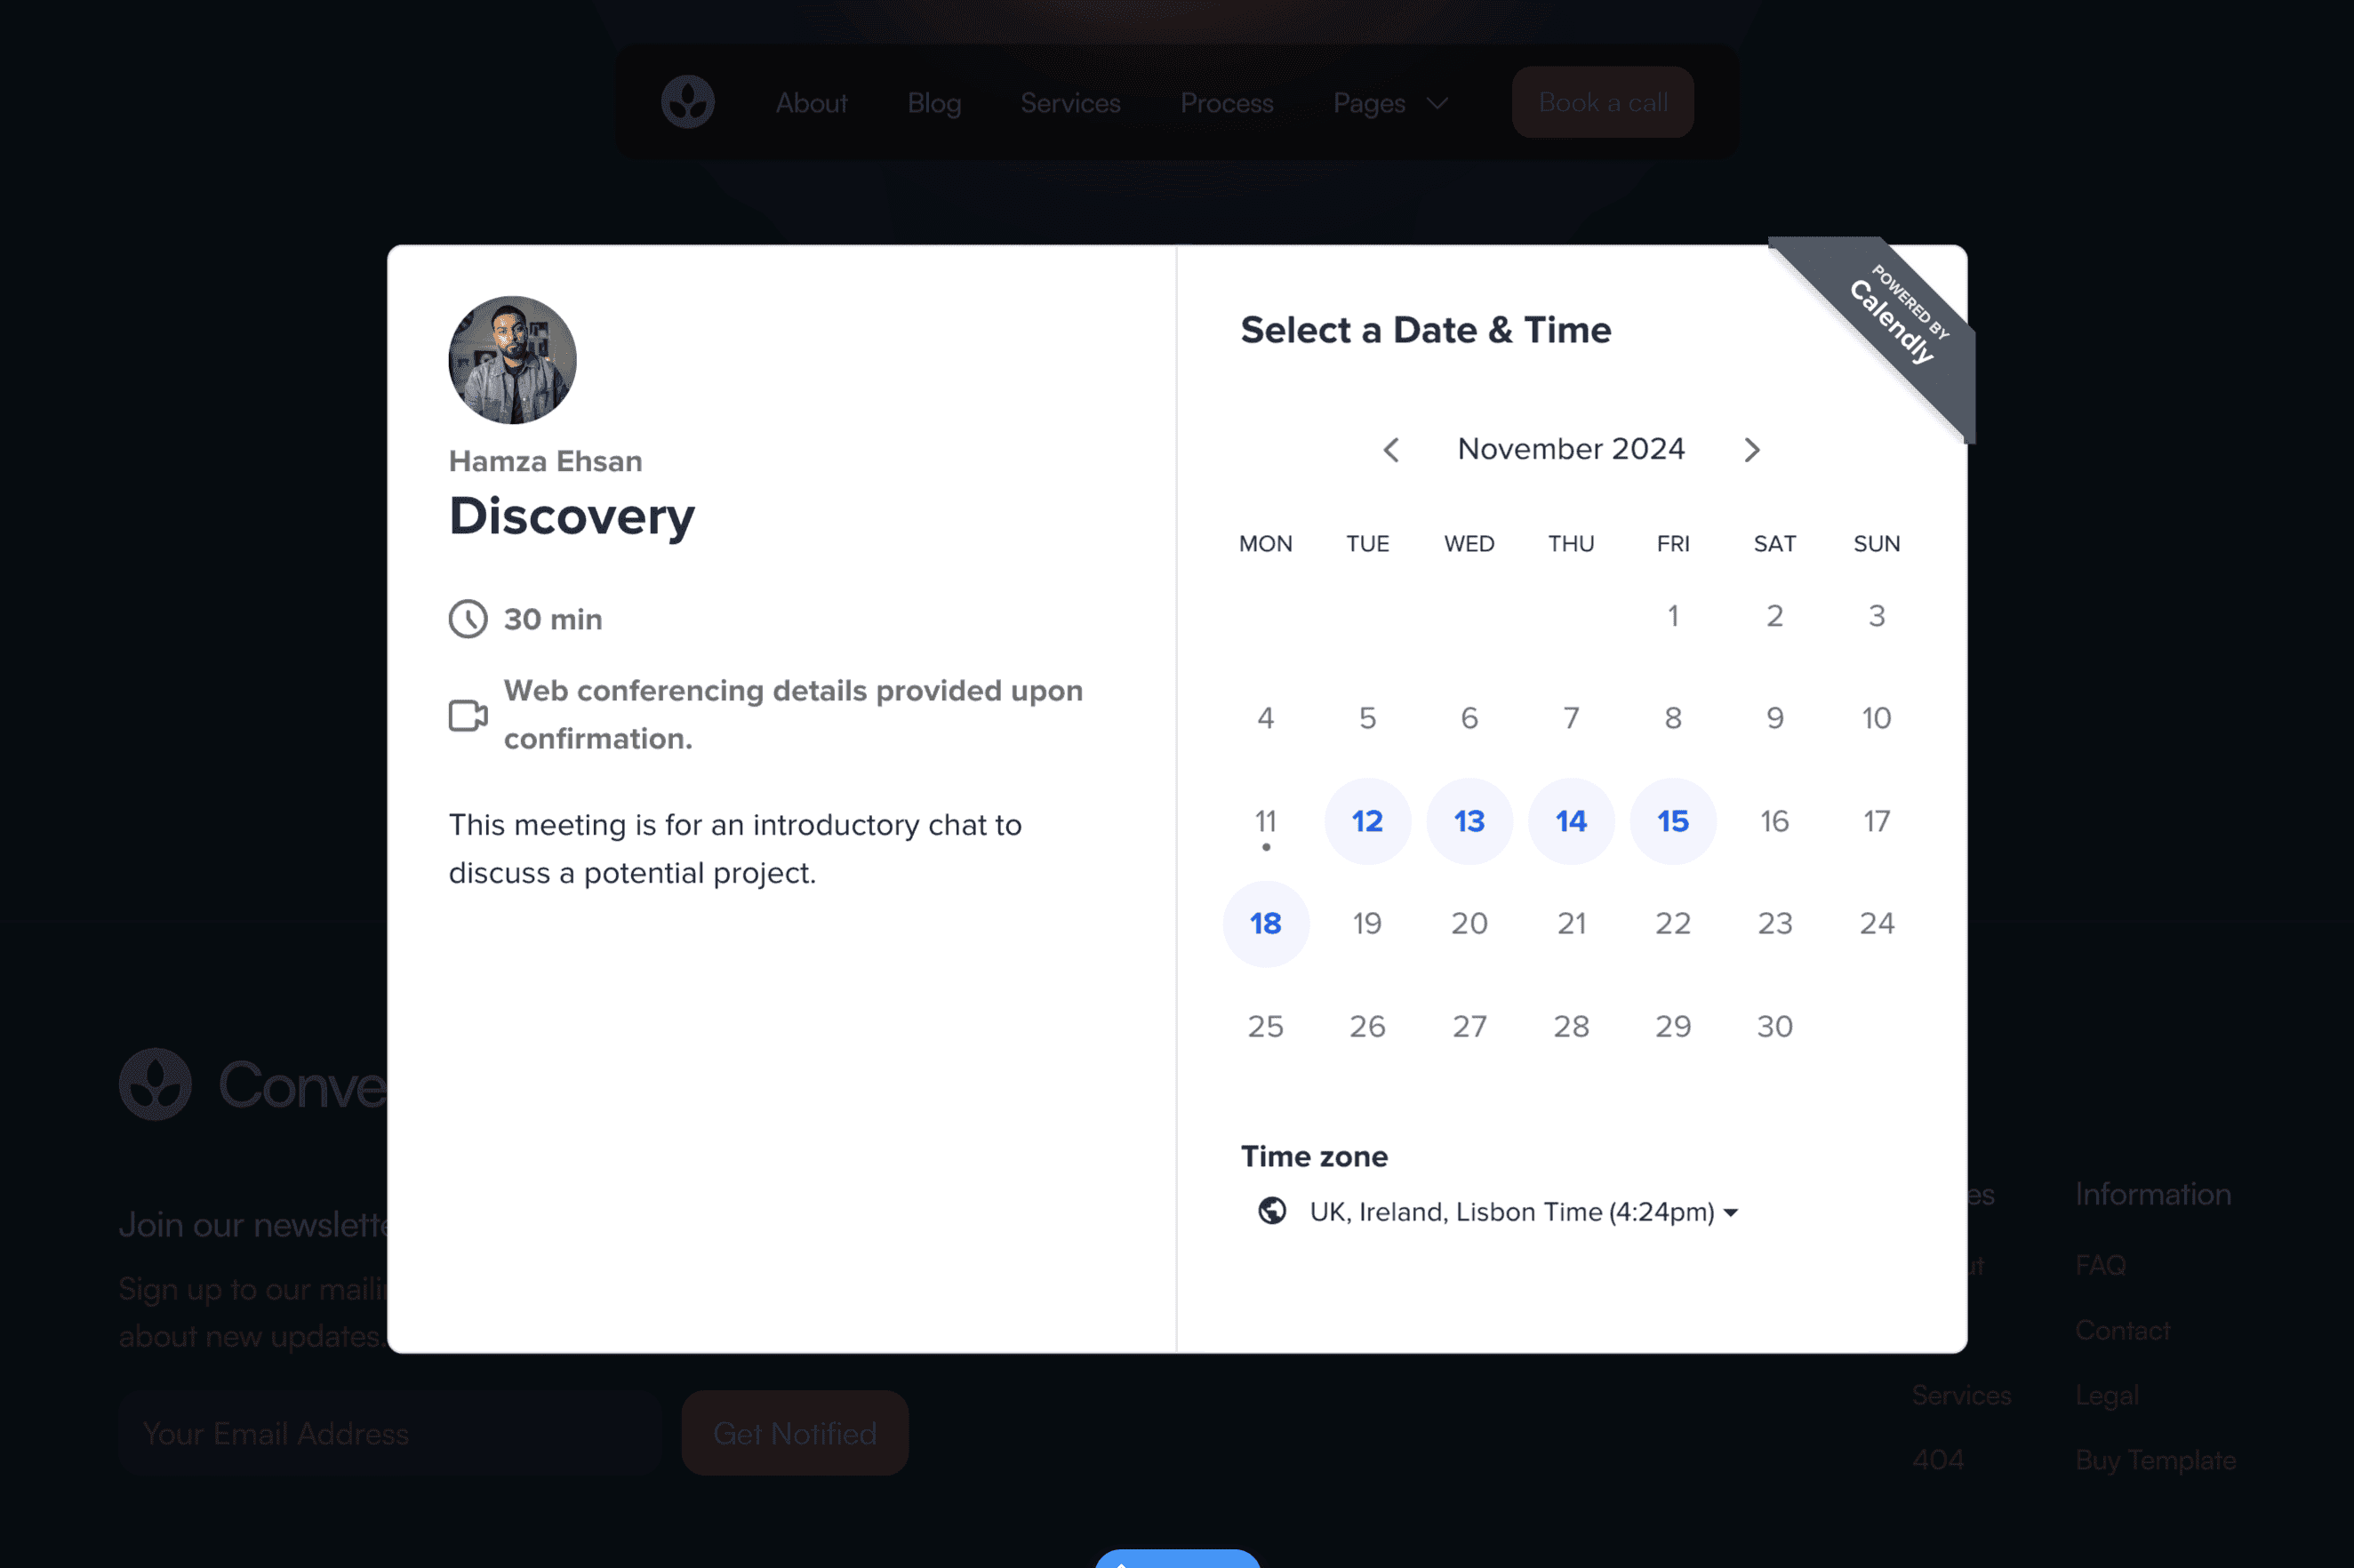
Embedding your calendar onto your website is great in most cases, but if you're looking for a slightly more dynamic way to present your calendar then a popup offers an engaging alternative that keeps your page design clean while still making it easy for visitors to book when they're ready.
Creating a popup is similar to embedding with a few extra steps, so let's dive in.
Step 1 - Create Overlay
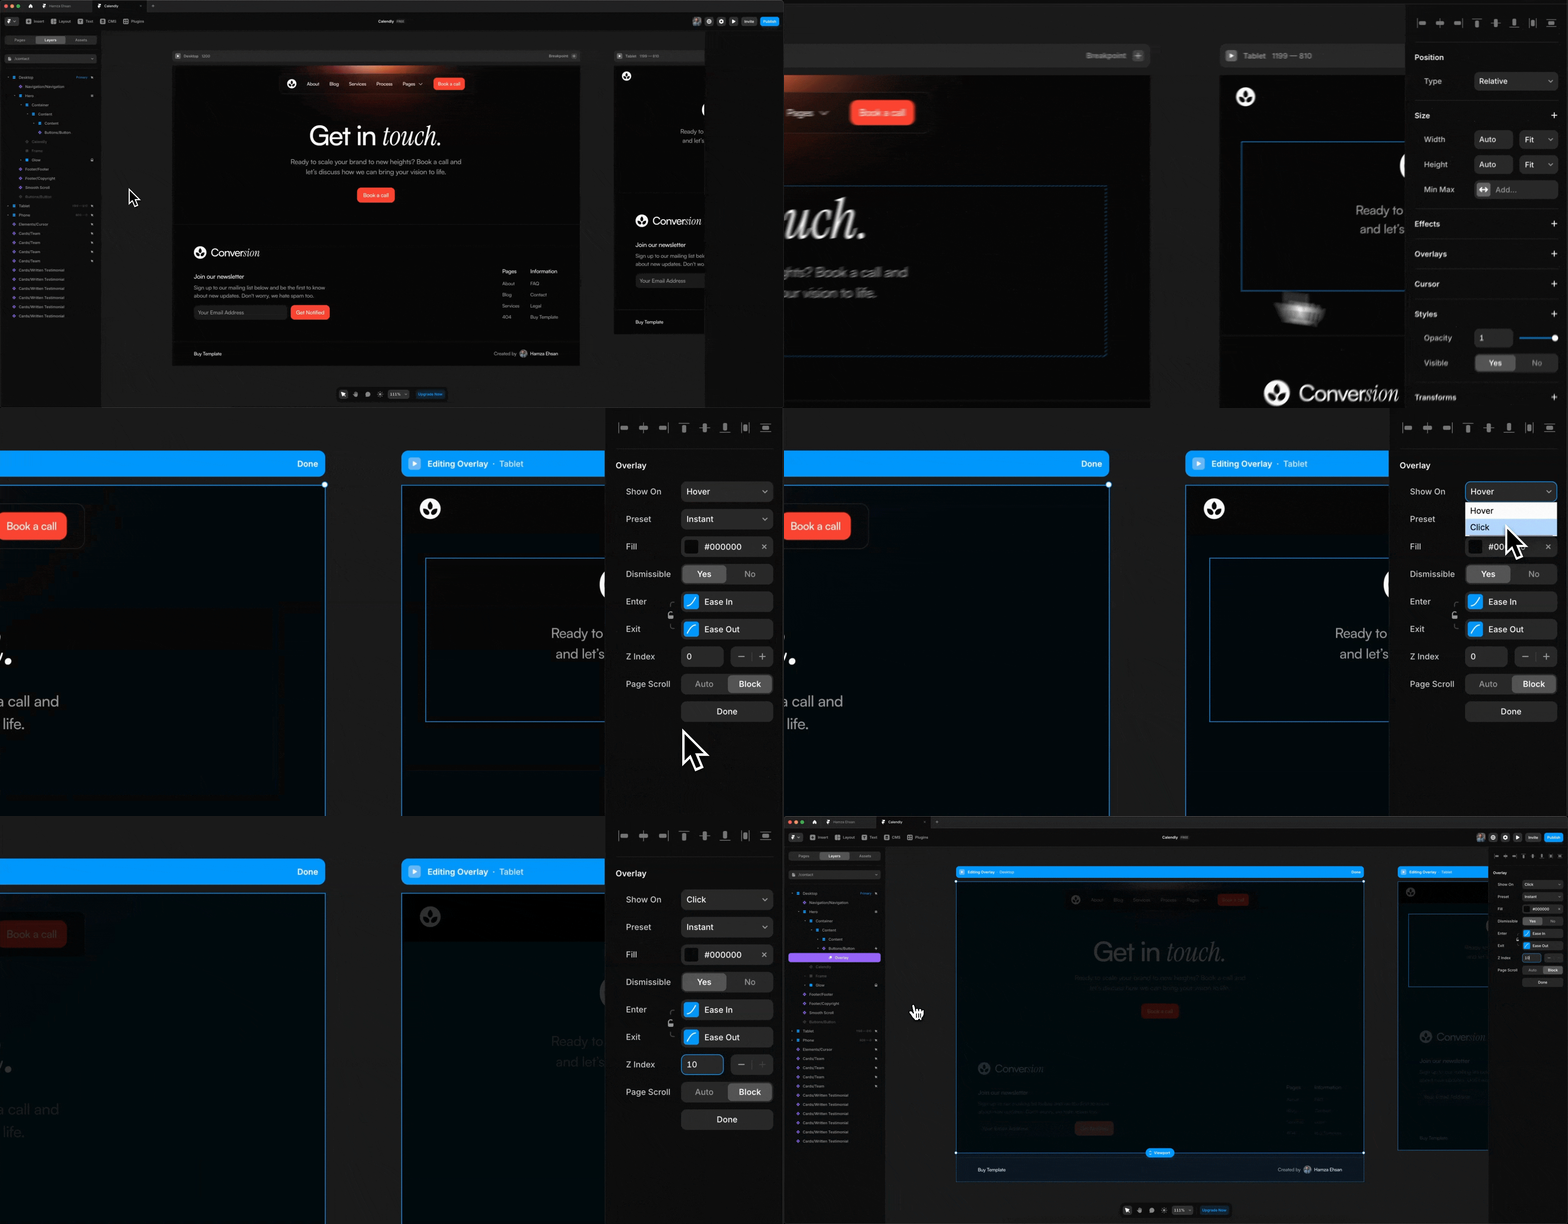
Click the button you want to activate the popup with, and in the right-hand menu, click on Overlay and choose Fixed.
Then change the Show On setting to Click and change the Z-Index to 10.
This will make sure that your popup is on top of all the other content on the page when it appears.
Step 2 - Insert Calendly Component
Next, go to the Insert menu, hover to Forms, drag the Calendly component onto the canvas beside your website.
Then, in the left-hand menu, drag the Calendly component into the Overlay we just created.
Then align the component both horizontally and vertically centred so it's in the middle of the overlay and resize it to your needs.

Step 3 - Copy Calendar Name
Head over to your Calendly account, find the event that you'd like visitors to be able to book, and click Share.
Then, copy your calendar and event name (everything after https://calendly.com/).

Step 4 - Configure Component
Head back to Framer, and paste it into the Calendly component.
And you're done. From there, your calendar will popup when you click on the button and you can go ahead and test to ensure it works as intended.

FAQ
Can I customize the look of my embedded Calendly calendar to match my website’s design?
Yes, Calendly offers customization options for premium users like color themes and display settings, so you can adjust its appearance to blend in with your website. You can modify these in Calendly’s settings, and any changes will automatically reflect on your embedded calendar.
Does embedding Calendly slow down my website?
Calendly is optimized for fast loading, but like any embedded widget, it can add a bit of load time. To keep things smooth, test the speed after embedding and consider using the popup option if you notice any slowdown.
What if I want to show multiple Calendly event types on my site?
You can embed multiple Calendly links for different events by adding separate Calendly components on your Framer site. Alternatively, you can use Calendly’s “Event Type” page, allowing visitors to choose from a list of your available events in one embed.
Will Calendly work well on mobile when embedded in Framer?
Yes, both Framer and Calendly are designed to be mobile-responsive. However, it’s always a good idea to check how the calendar displays on mobile devices and adjust the layout or size if needed.
Can I add a direct Calendly link instead of embedding it?
Yes, if you prefer a simpler setup, you can add a direct link to your Calendly page instead of embedding it. Just create a “Book a Call” button on your Framer site and link it to your Calendly URL.
What if I need to remove or replace Calendly later?
To remove or update the Calendly component, go back to your Framer site, select the component, and either delete it or replace the URL with a new Calendly link. This process won’t affect your website’s structure.
Conclusion
Integrating Calendly into your Framer website can make a big difference in how easily clients can connect with you.
Whether you embed it directly on a page or use a popup for a cleaner design, setting up Calendly is straightforward and adds real value to your site.
By following these steps, you’ll have a scheduling tool that not only makes booking simple for visitors but also saves you time on back-and-forth emails.
And if you’re looking for more ways to enhance your Framer site, my templates are built to streamline your setup process and give you a professional, conversion-focused site in no time.
